CICD pipeline for Blazor application on Azure without writing any code.


For creating CICD pipeline on azure portal for Blazor or Asp.net Core Project is very simple and straight forward. In this short demo post, we will see how do it.

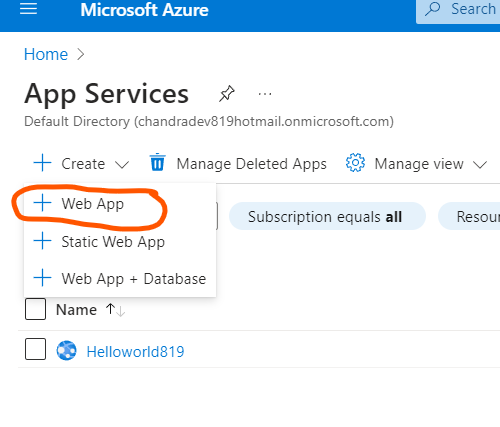
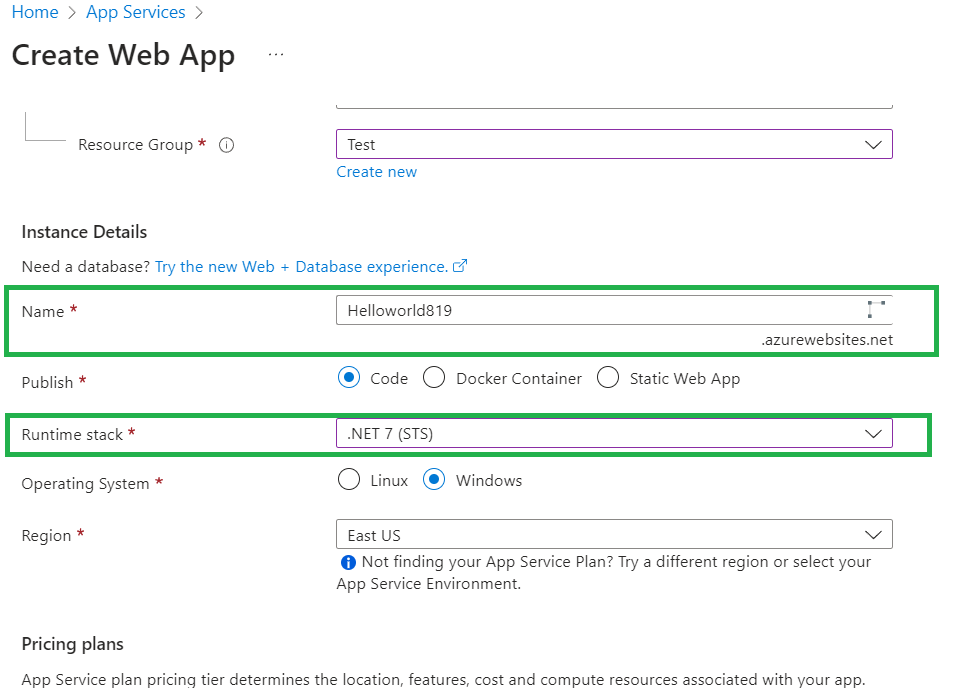
Step 1: Create the App Service like this.

Step 2: Do the required mandatory setting like

Step 3: Do the configuration for GitHub Action setting like given below image. This will help us to create CICD pipeline for us.

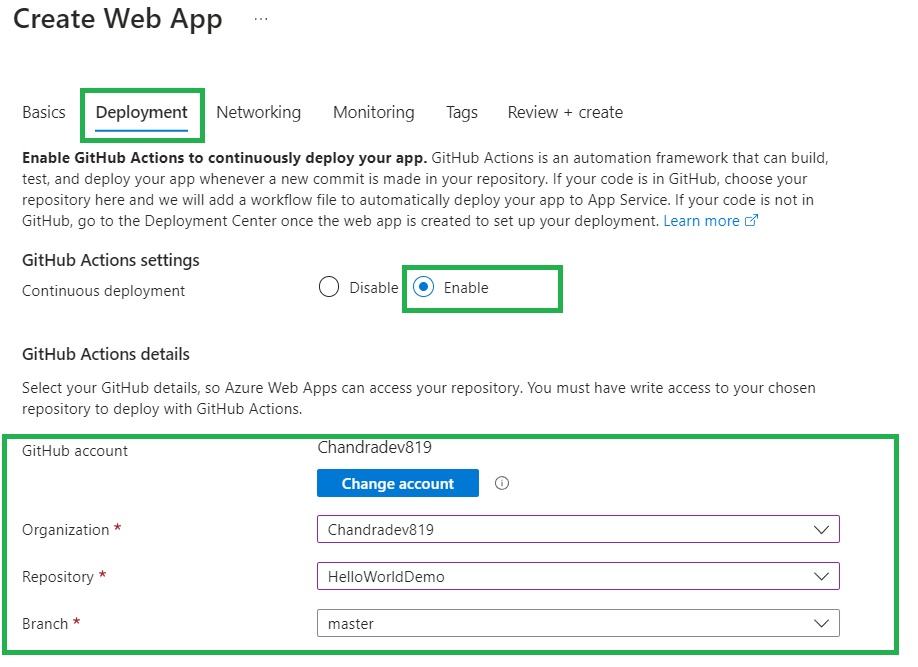
Step 4: Now click on create web app.

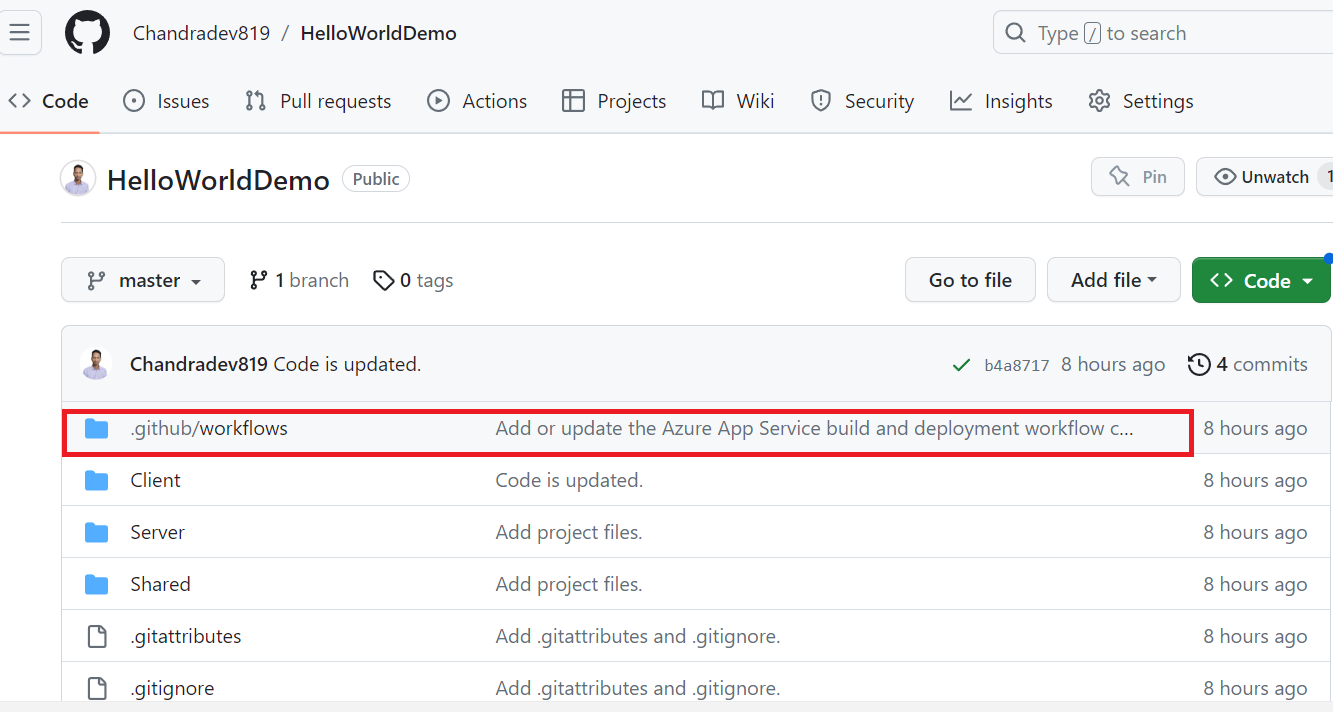
If you will come to github repo, you will see that azure webapp deployment wizard has already added yaml file for us. which will trigger the deployment process for us.

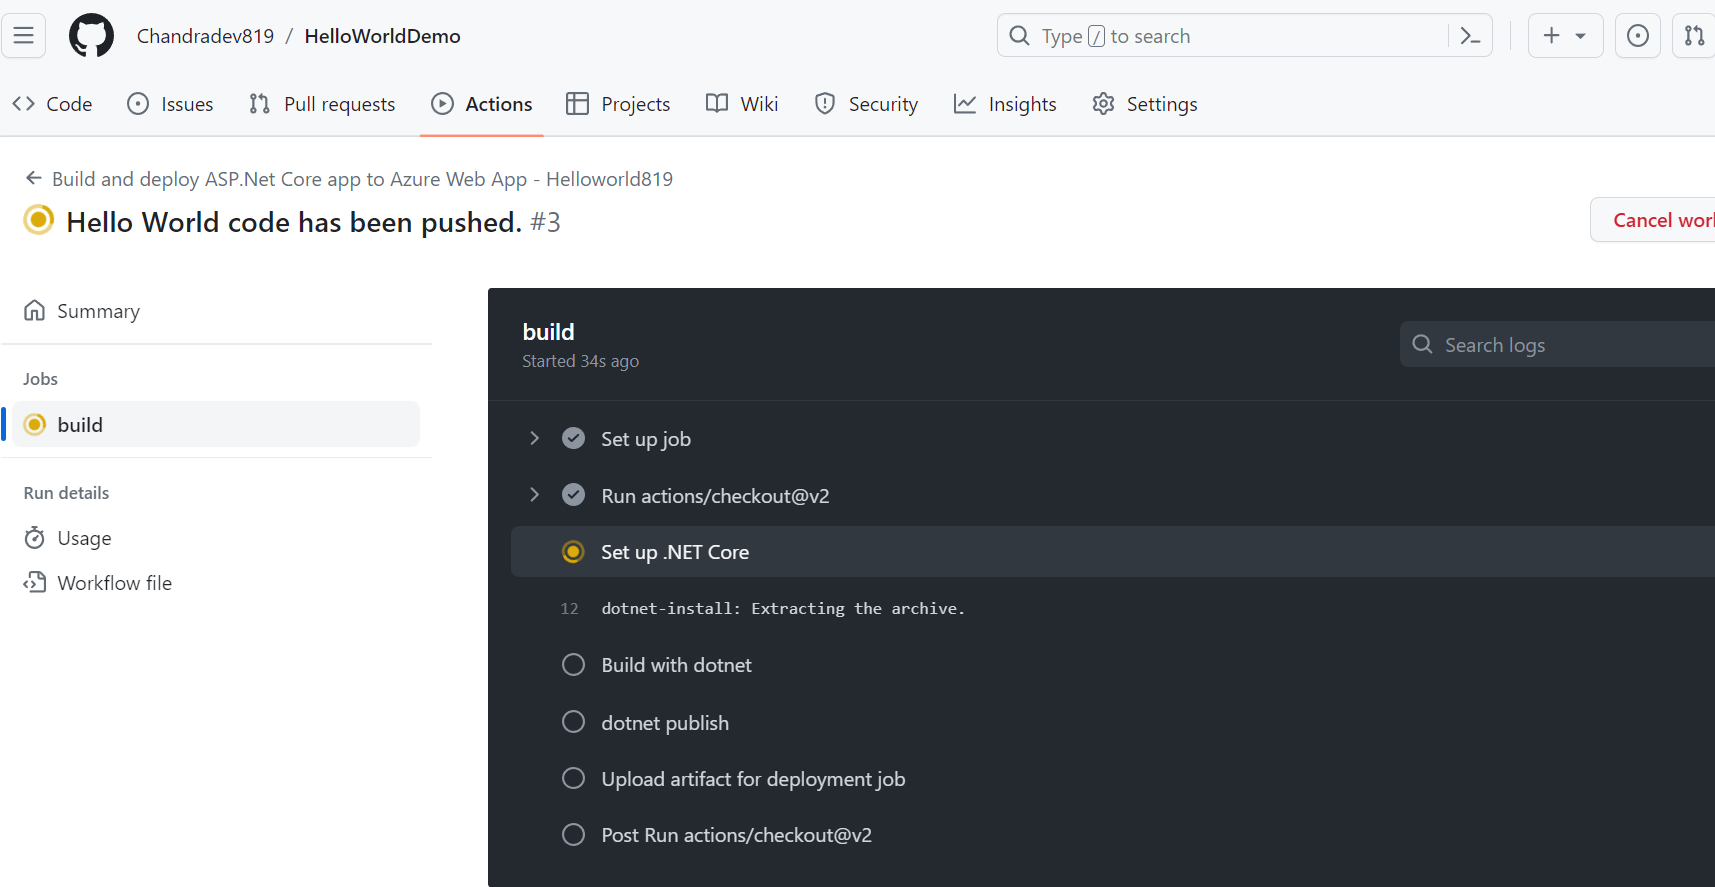
Step 5: Now change the code on source code and push to GitHub repo. then CICD process will trigger.

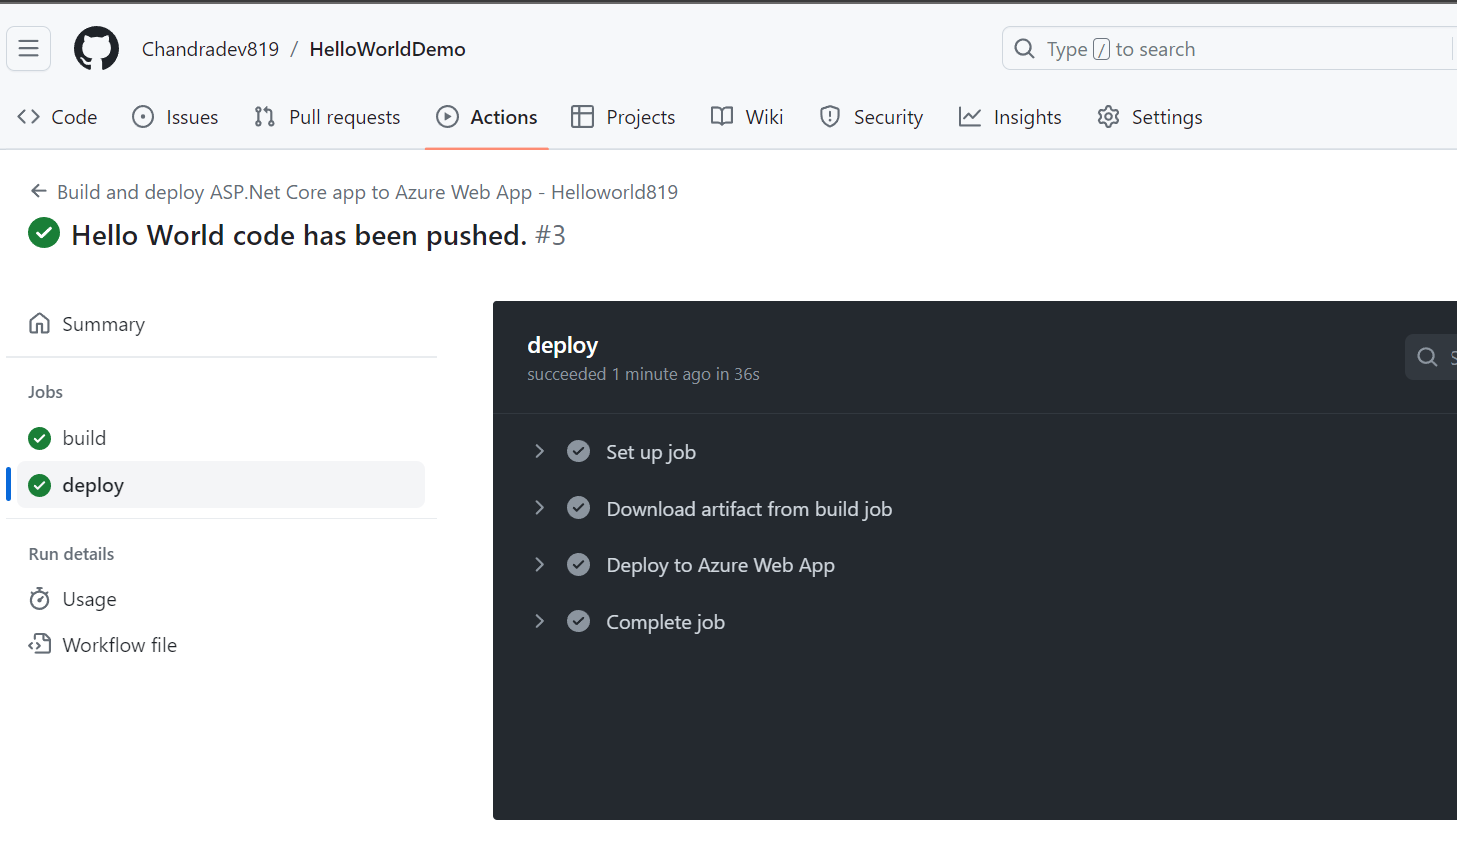
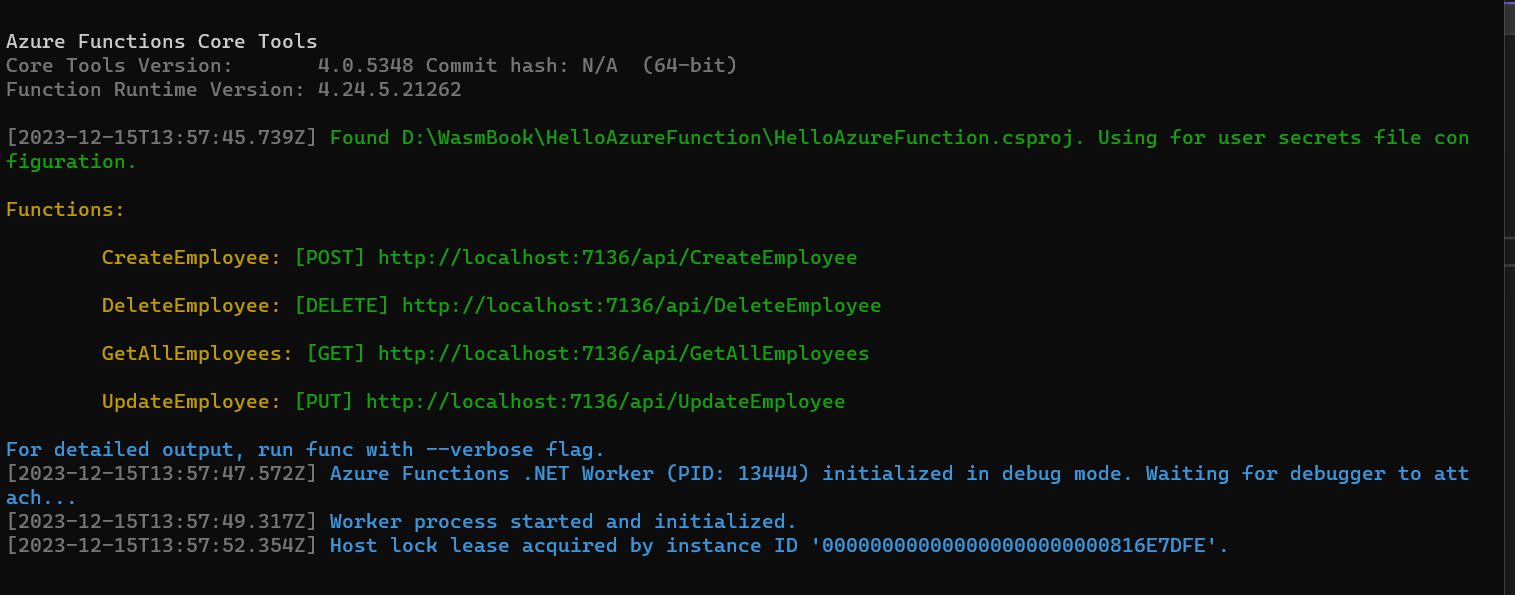
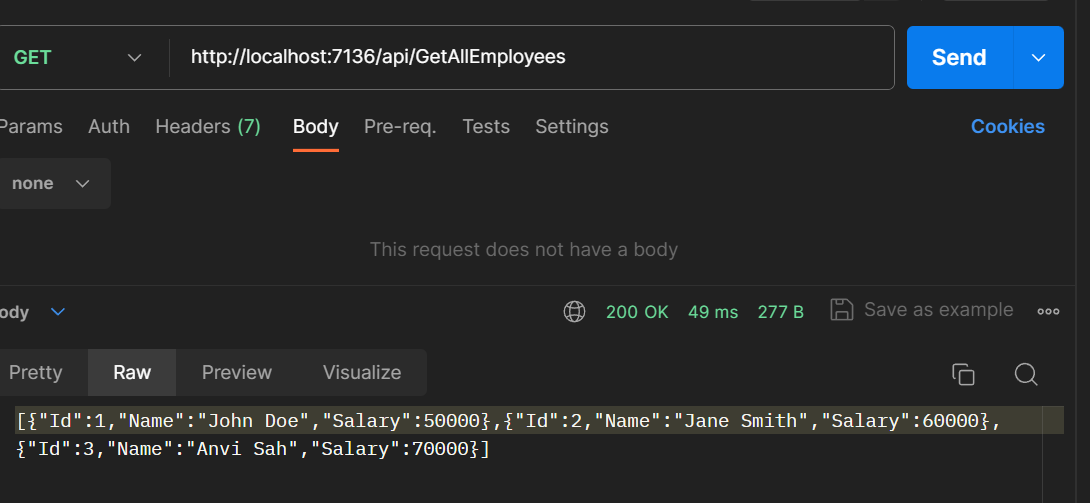
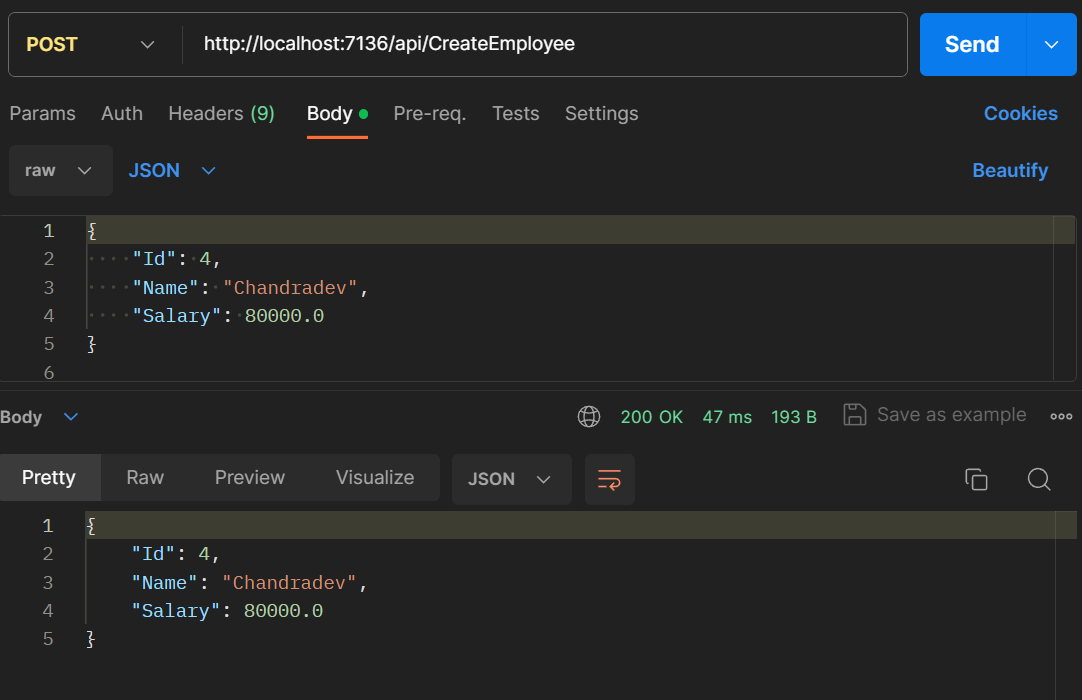
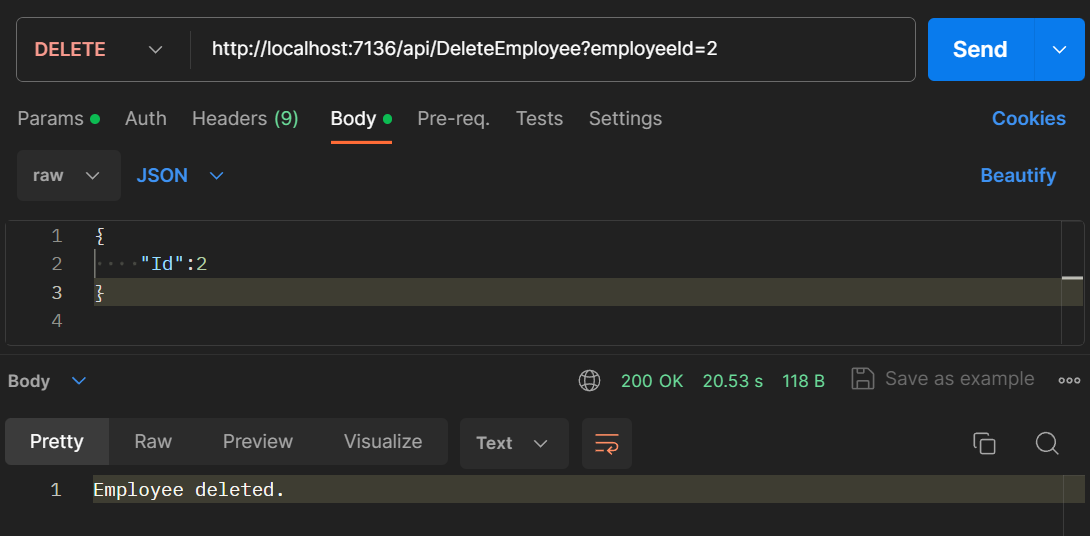
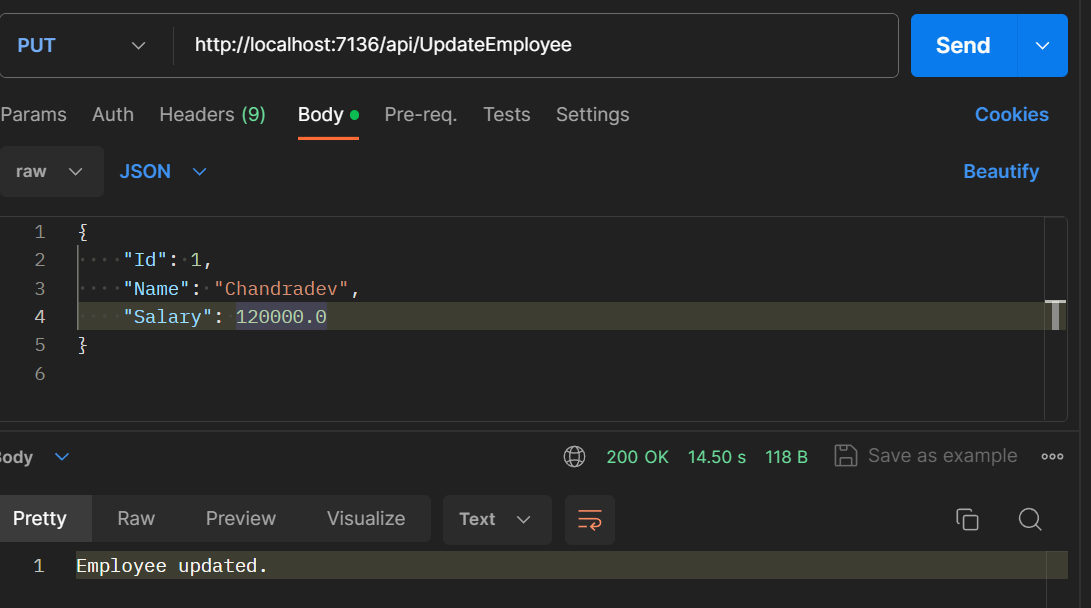
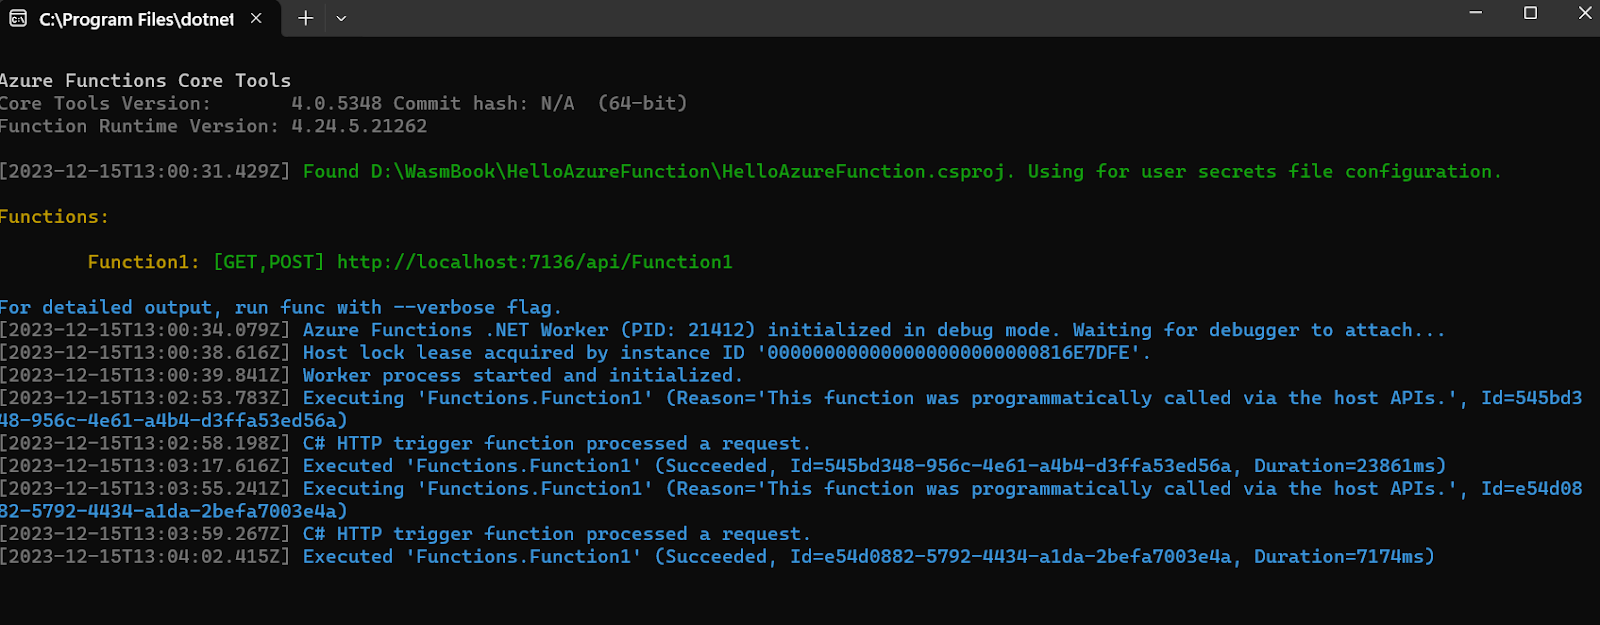
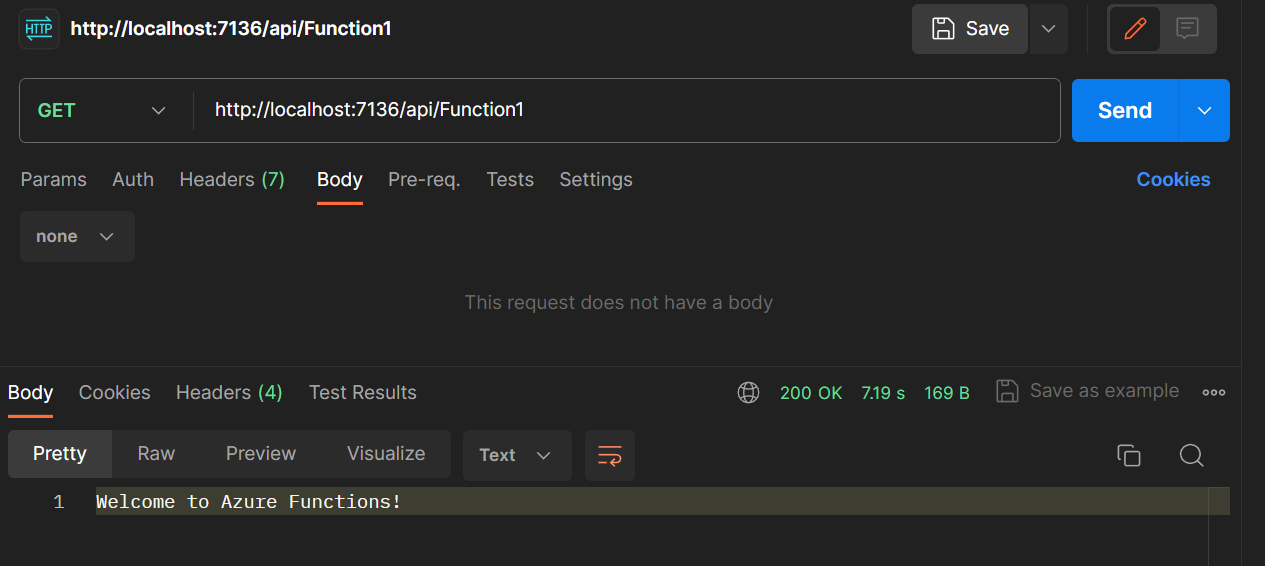
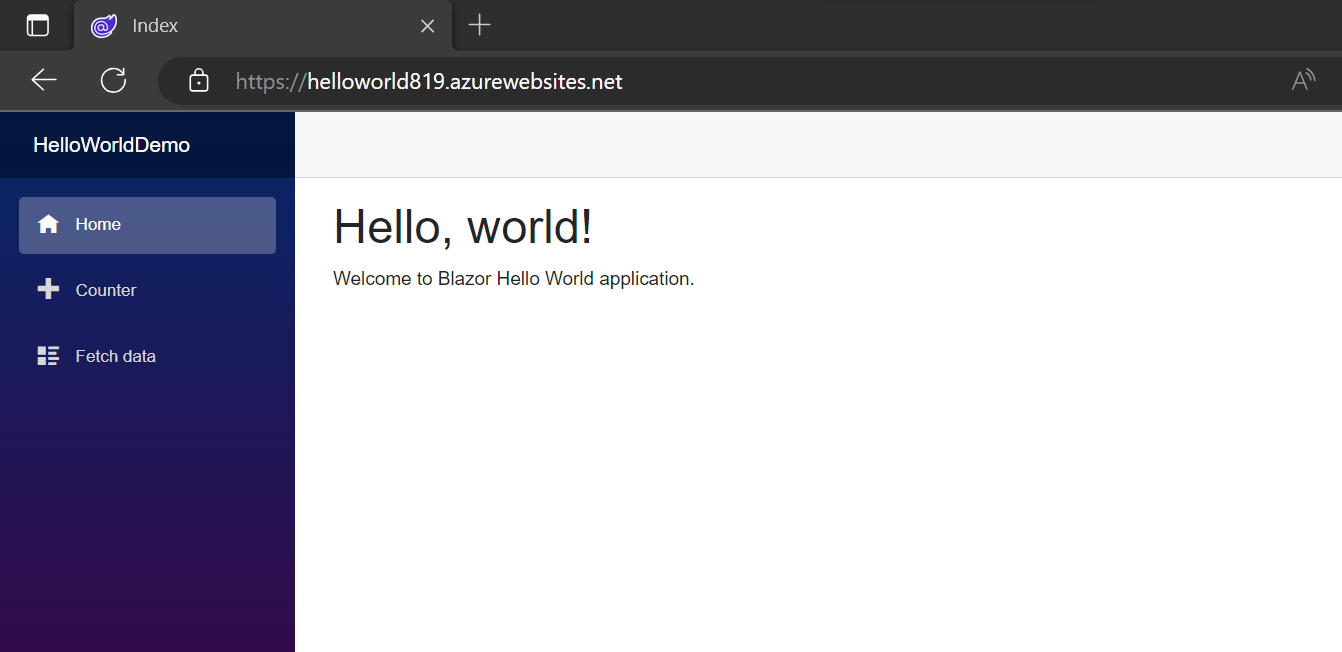
Step 7: Now run the created web app. we will see output like this

Summary:

In the above demo, we saw that without writing single line of code azure portal is creating CICD pipeline for us. It will hardly take 5 to 10 min to create CICD pipeline.

But this approach will not work for docker image or deployment on Linux.

Source code: https://github.com/Chandradev819/HelloWorldDemo

How to use html dropdown in Blazor


While working on a Blazor project, so many times we will use plain HTML dropdown. In this scenario, we will get a requirement to trigger the event and reset the selection item to the initial state.

Here are some code snippets for completing this task.

Approach 1:

@page "/counter"

<select @onchange="OptionChanged" value="@selectedOption">
    <option value="-1">Select Option</option>
    @foreach (var option in options)
    {
        <option value="@option">@option</option>
    }
</select>

<button @onclick="ClearSelection">Clear Selection</button>

@code {
    private List<string> options = new List<string> { "Option 1", "Option 2", "Option 3" };
    private string selectedOption { get; set; } = "-1"; // Set default value to "-1"

    private void OptionChanged(ChangeEventArgs e)
    {
        // Extract the selected value from the event argument
        string selectedValue = e.Value.ToString();
        Console.WriteLine($"Selected option: {selectedValue}");
        // Assign the selected value to the selectedOption variable
        selectedOption = selectedValue;
    }

    private void ClearSelection()
    {
        // Clear the selected option
        selectedOption = "-1"; // Reset to default value "-1"
        StateHasChanged(); // Trigger a UI update
    }
}

Approach 2:

@page "/"

<PageTitle>Home</PageTitle>

<select @onchange="OptionChanged" value="@selectedOption">
    <option value="">Select Option</option>
    @foreach (var option in options)
    {
        <option value="@option">@option</option>
    }
</select>

<button @onclick="ClearSelection">Clear Selection</button>

@code {
    private List<string> options = new List<string> { "Option 1", "Option 2", "Option 3" };
    private string selectedOption { get; set; } = "";

    private void OptionChanged(ChangeEventArgs e)
    {
        // Extract the selected value from the event argument
        string selectedValue = e.Value.ToString();
        Console.WriteLine($"Selected option: {selectedValue}");
        // Assign the selected value to the selectedOption variable
        selectedOption = selectedValue;
    }

    private void ClearSelection()
    {
        // Clear the selected option
        selectedOption = "";
        // Trigger a UI update
        StateHasChanged();
    }
}

Summary:

In this code snippet, we demonstrate how to handle various scenarios using an HTML dropdown in Blazor.

Http CRUD Operation in Azure Function with C# (Part 3)


This is part 3 blog post of azure function. If you have not read previous post. Please read from here.

In this demo, for shake of simplicity, we will create dummy employee collection data and perform CRUD operation.

Step 1: Create the Employee class in model folder like this.

namespace HelloAzureFunction.Model
{
    public class Employee
    {
        public int Id { get; set; }
        public string Name { get; set; }
        public decimal Salary { get; set; }
    }
}

Step 2: Create the Http trigger Employee Function with Anonymous AuthorizationLevel and write the method for Get, Post, Put and Delete method like this

Post Method

private readonly List<Employee> employeeDataStore = new List<Employee>();
private readonly ILogger _logger;

public EmpFunction(ILoggerFactory loggerFactory)
{
    _logger = loggerFactory.CreateLogger<EmpFunction>();
    InitializeDummyData();
}

// Initialization method to populate dummy data
private void InitializeDummyData()
{
    employeeDataStore.Add(new Employee { Id = 1, Name = "John Doe", Salary = 50000 });
    employeeDataStore.Add(new Employee { Id = 2, Name = "Jane Smith", Salary = 60000 });
    employeeDataStore.Add(new Employee { Id = 3, Name = "Anvi Sah", Salary = 70000 });
}

//Post Method
[Function("CreateEmployee")]
public HttpResponseData CreateEmployee(
    [HttpTrigger(AuthorizationLevel.Anonymous, "post")] HttpRequestData req)
{
    _logger.LogInformation("CreateEmployee function processed a request.");

    var requestBody = req.ReadAsStringAsync().Result;
    var newEmployee = JsonSerializer.Deserialize<Employee>(requestBody);

    // Need to Store in actual database
    employeeDataStore.Add(newEmployee);

    var response = req.CreateResponse(HttpStatusCode.OK);
    response.Headers.Add("Content-Type", "application/json; charset=utf-8");

    response.WriteString(JsonSerializer.Serialize(newEmployee));

    return response;
}

GET Method

//Get Method
[Function("GetAllEmployees")]
public HttpResponseData GetAllEmployees(
    [HttpTrigger(AuthorizationLevel.Anonymous, "get")] HttpRequestData req)
{
    _logger.LogInformation("GetAllEmployees function processed a request.");

    var response = req.CreateResponse(HttpStatusCode.OK);
    response.Headers.Add("Content-Type", "application/json; charset=utf-8");

    response.WriteString(JsonSerializer.Serialize(employeeDataStore));

    return response;
}

PUT Method

//PUT Method
[Function("UpdateEmployee")]
public HttpResponseData UpdateEmployee(
    [HttpTrigger(AuthorizationLevel.Anonymous, "put")] HttpRequestData req)
{
    _logger.LogInformation("UpdateEmployee function processed a request.");

    var requestBody = req.ReadAsStringAsync().Result;
    var updatedEmployee = JsonSerializer.Deserialize<Employee>(requestBody);

    // Find and update the employee based on Id
    var existingEmployee = employeeDataStore.Find(e => e.Id == updatedEmployee.Id);
    if (existingEmployee != null)
    {
        existingEmployee.Name = updatedEmployee.Name;
        existingEmployee.Salary = updatedEmployee.Salary;
    }

    var response = req.CreateResponse(HttpStatusCode.OK);
    response.WriteString("Employee updated.");

    return response;
}

Delete Method

 //Delete Method
 [Function("DeleteEmployee")]
 public HttpResponseData DeleteEmployee(
     [HttpTrigger(AuthorizationLevel.Anonymous, "delete")] HttpRequestData req)
 {
     _logger.LogInformation("DeleteEmployee function processed a request.");

     var requestBody = req.ReadAsStringAsync().Result;
     var employeeIdToDelete = JsonSerializer.Deserialize<Employee>(requestBody);

     // Find and remove the employee based on Id
     var employeeToDelete = employeeDataStore.Find(e => e.Id == employeeIdToDelete.Id);
     if (employeeToDelete != null)
     {
         employeeDataStore.Remove(employeeToDelete);
     }

     var response = req.CreateResponse(HttpStatusCode.OK);
     response.WriteString("Employee deleted.");

     return response;
 }

Now run the application and test on postman.

Summary

In the above demo, we saw that how easily we are able to create RESTful APIs with the help of HTTP Trigger.

Source Code

https://github.com/Chandradev819/HelloAzureFunction.git

Creating Azure Function with Visual Studio 2022(Part 2)


We can create the azure function using Visual Studio 2022, VS Code and with Azure Portal website. But as Web Developers we will choose Visual Studio 2022. Visual Studio 2022 is one of the most powerful development editors.

Step 1: Create the new project for Azure function like this.

Step 2: Click on the Create Button of the wizard window. Now it will create basic scaffolding code for azure function.

Code snippets

[Function("Function1")]
public HttpResponseData Run([HttpTrigger(AuthorizationLevel.Anonymous, "get", "post")] HttpRequestData req)
{
    _logger.LogInformation("C# HTTP trigger function processed a request.");

    var response = req.CreateResponse(HttpStatusCode.OK);
    response.Headers.Add("Content-Type", "text/plain; charset=utf-8");

    response.WriteString("Welcome to Azure Functions!");

    return response;
}

The Run method is the entry point of the function. It takes an HttpRequestData object as a parameter, representing the incoming HTTP request. The HttpTrigger attribute specifies that this function can be triggered by HTTP requests, and it allows both “get” and “post” methods.

var response = req.CreateResponse(HttpStatusCode.OK);
response.Headers.Add("Content-Type", "text/plain; charset=utf-8");

Here, a new HttpResponseData object is created using the CreateResponse method of the incoming HttpRequestData. The response status code is set to OK (200), and a “Content-Type” header is added to specify that the response will be in plain text with UTF-8 encoding.

Step 3: Run the application then you will see command window like this

Step 4: Now trigger the given GET and POST method from the postman. It will call the azure function code and return “Welcome to Azure Functions!”


Summary :

In this post we saw that how to create basic azure function. it is very simple and straight forward to create azure function with visual studio 2022. It is exactly similar to normal web api project. In next post we will see how to create CRUD Operation in Azure function.

An Introduction to Azure Functions (Part 1)


Azure Functions is a serverless computing service offered by Microsoft Azure that allows you to write less code, maintain less infrastructure, and save on cost.

It enables the execution of small units of code, called functions, without the need to manage servers or any other infrastructure. 

These functions are triggered by specific events or inputs, allowing developers to respond to events in real time. By utilizing Azure Functions, developers can focus solely on writing code and not worry about infrastructure management.

Benefits of Using Azure Functions

  • Serverless Computing: Azure Functions enable serverless computing, allowing you to focus on writing code without managing the underlying infrastructure. This can lead to increased development speed and reduced operational overhead.
  • Cost-Efficiency: With serverless architecture, you pay only for the compute resources used during the execution of functions. This can result in cost savings compared to traditional server-based approaches where you might pay for idle resources.
  • Scalability: Azure Functions automatically scale based on demand. Functions can be triggered individually, enabling your application to handle varying workloads efficiently.
  • Event-Driven: Functions can be triggered by various events such as HTTP requests, timer-based schedules, or events from other Azure services. This makes it suitable for building event-driven architectures and microservices.
  • Support for Multiple Languages: Azure Functions supports multiple programming languages, including C#, F#, C#, JavaScript, Python,Java and PowerShell.
  • Integration with Azure Services: Azure Functions seamlessly integrates with other Azure services, making it easy to connect and interact with services like Azure Storage, Azure SQL Database, or Azure Event Hubs.
  • Rapid Development and Deployment: The serverless model allows for rapid development and deployment. You can focus on writing the necessary code for your functions without dealing with infrastructure concerns, leading to faster time-to-market.
  • DevOps Integration: Azure Functions can be easily integrated into your DevOps processes, enabling continuous integration and deployment. This aligns with modern development practices, promoting agility and collaboration.

Different Types of Triggers on Azure Functions

  • HTTP Trigger: This trigger allows your function to be invoked by an HTTP request. It’s commonly used for building RESTful APIs or handling HTTP-based events.
  • Timer Trigger: With a timer trigger, your function can be scheduled to run at specified intervals or according to a cron expression. This is useful for periodic tasks or background processing.
  • Blob Trigger: This trigger is activated when a new or updated blob is detected in Azure Storage. It’s often used for scenarios involving file processing or data ingestion.
  • Queue Trigger: When a new message arrives in an Azure Storage Queue, a function with a queue trigger can be invoked. This is useful for building decoupled systems and handling asynchronous processing.
  • Event Hub Trigger: This trigger processes events from Azure Event Hubs, which is a scalable and distributed event streaming platform. It’s suitable for handling large-scale event streams.
  • Service Bus Trigger: With a Service Bus trigger, your function can respond to messages arriving in Azure Service Bus queues or topics. This is useful for building reliable and asynchronous communication between components.
  • Cosmos DB Trigger: This trigger reacts to changes in Azure Cosmos DB collections, allowing your function to process documents that are inserted or modified in the database.
  • Event Grid Trigger: Azure Event Grid triggers enable your function to respond to events from various Azure services or custom sources. It provides a flexible and event-driven architecture.
  • GitHub/WebHook Trigger: This trigger allows your function to respond to events from GitHub repositories, such as code commits or pull requests.
  • Durable Functions Orchestration Trigger: Durable Functions introduce a special trigger for orchestrations, allowing you to define workflows and manage the state of long-running processes.

These triggers provide a wide range of options for handling different types of events in your applications. As a web developer working with Azure, you can choose the trigger type that best fits the requirements of your projects, whether they involve HTTP requests, scheduled tasks, data changes, or other events. 

Summary

In this introduction blog post we saw introduction of azure function, advantages and type of trigger in azure function. In next blog post we will see how to create Azure function with Visual Studio 2022.

‘<‘ is an invalid start of a value. Path: $ | LineNumber: 0 | BytePositionInLine: 0.


If you are getting this error message with Web API in Blazor WeAssembly application. You can troubleshoot following ways.

  1. Take the api end point and trigger with PostMan
  2. If it is not triggering, then try to see the api method attribute. So many we missed out input parameter of Web api method.

In my case, I was missed out InstanceId for Web API Method

 [HttpGet]
 [Route("[action]]
 public async Task<List<ProductModel>> GetProducts(int instanceId) => await _service.GetProducts(instanceId);

Fix: Pass the instanceId parameter to web api method.

 [HttpGet]
 [Route("[action]/{instanceId}")]
 public async Task<List<ProductModel>> GetProducts(int instanceId) => await _service.GetProducts(instanceId);