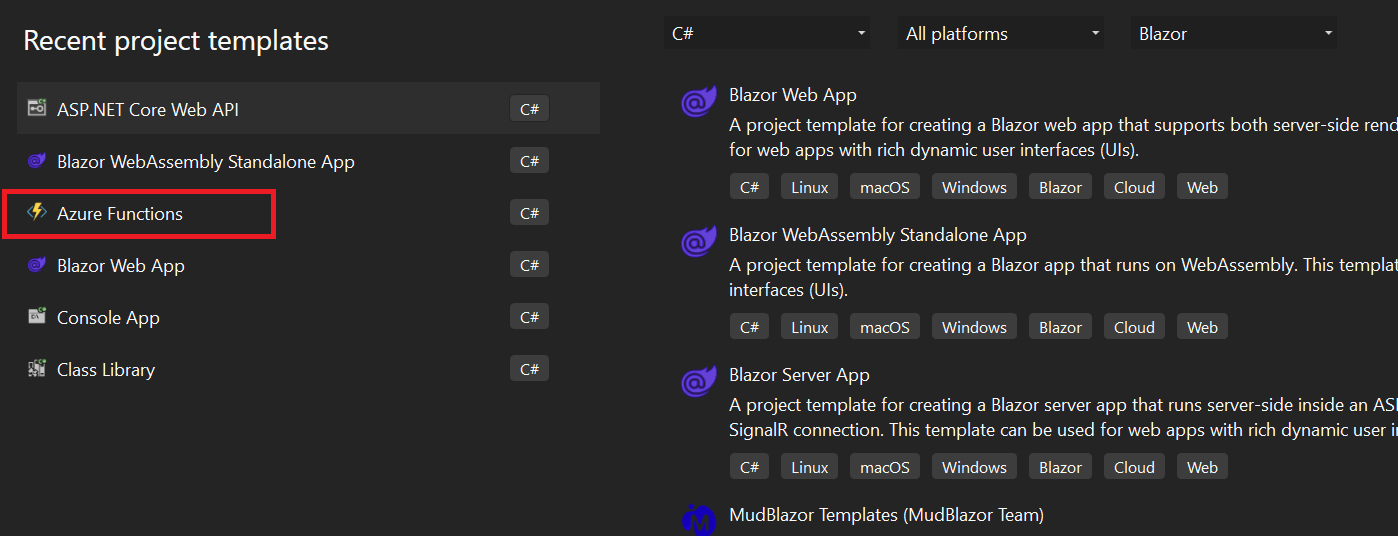
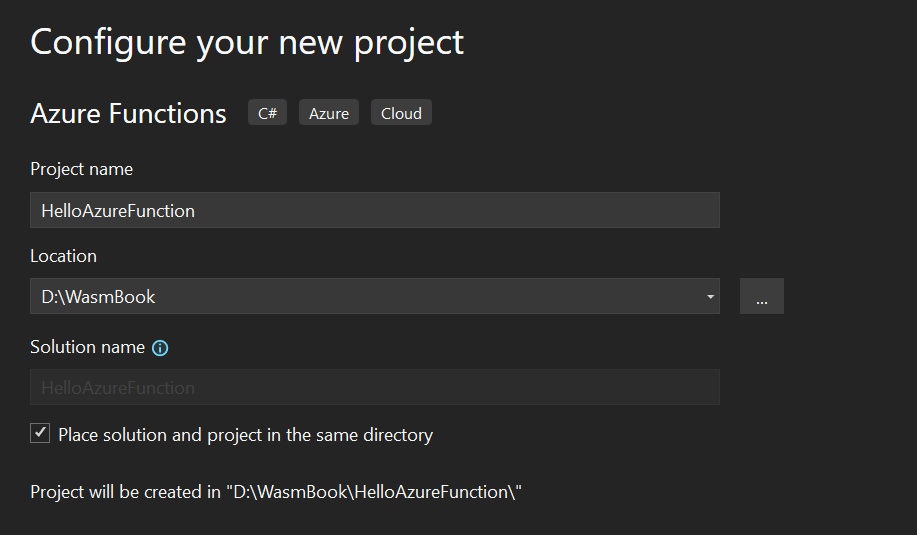
This is part 3 blog post of azure function. If you have not read previous post. Please read from here.
In this demo, for shake of simplicity, we will create dummy employee collection data and perform CRUD operation.
Step 1: Create the Employee class in model folder like this.
namespace HelloAzureFunction.Model
{
    public class Employee
    {
        public int Id { get; set; }
        public string Name { get; set; }
        public decimal Salary { get; set; }
    }
}
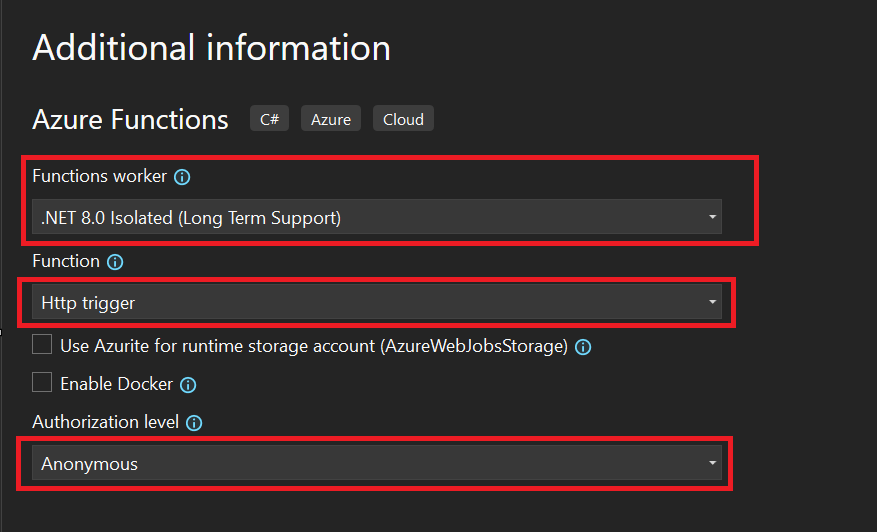
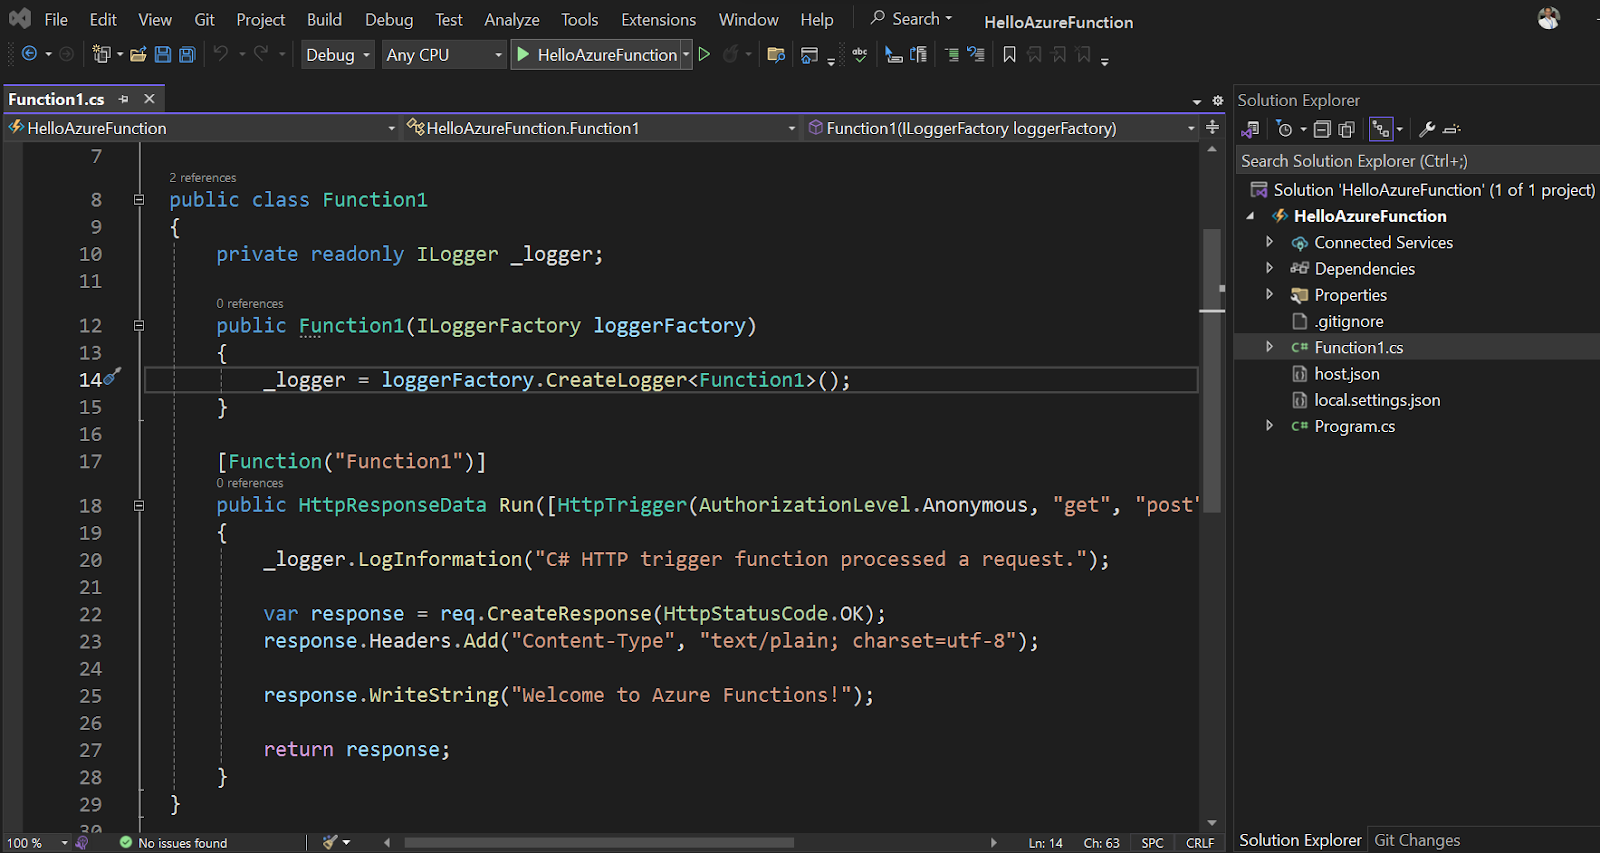
Step 2: Create the Http trigger Employee Function with Anonymous AuthorizationLevel and write the method for Get, Post, Put and Delete method like this
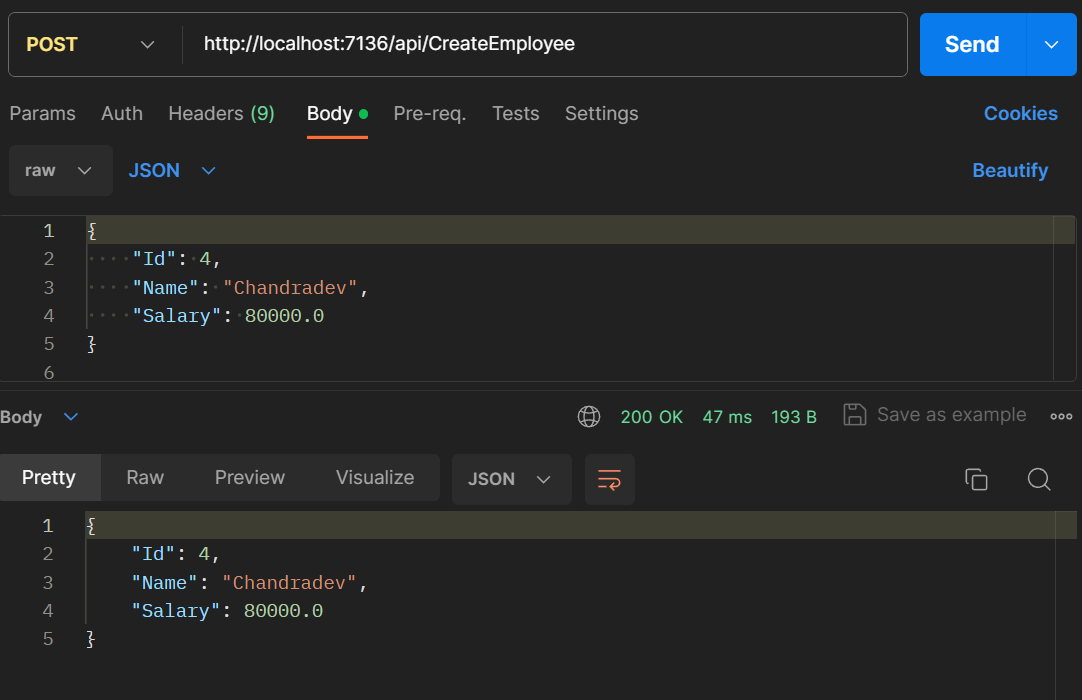
Post Method
private readonly List<Employee> employeeDataStore = new List<Employee>();
private readonly ILogger _logger;

public EmpFunction(ILoggerFactory loggerFactory)
{
    _logger = loggerFactory.CreateLogger<EmpFunction>();
    InitializeDummyData();
}

// Initialization method to populate dummy data
private void InitializeDummyData()
{
    employeeDataStore.Add(new Employee { Id = 1, Name = "John Doe", Salary = 50000 });
    employeeDataStore.Add(new Employee { Id = 2, Name = "Jane Smith", Salary = 60000 });
    employeeDataStore.Add(new Employee { Id = 3, Name = "Anvi Sah", Salary = 70000 });
}

//Post Method
[Function("CreateEmployee")]
public HttpResponseData CreateEmployee(
    [HttpTrigger(AuthorizationLevel.Anonymous, "post")] HttpRequestData req)
{
    _logger.LogInformation("CreateEmployee function processed a request.");

    var requestBody = req.ReadAsStringAsync().Result;
    var newEmployee = JsonSerializer.Deserialize<Employee>(requestBody);

    // Need to Store in actual database
    employeeDataStore.Add(newEmployee);

    var response = req.CreateResponse(HttpStatusCode.OK);
    response.Headers.Add("Content-Type", "application/json; charset=utf-8");

    response.WriteString(JsonSerializer.Serialize(newEmployee));

    return response;
}
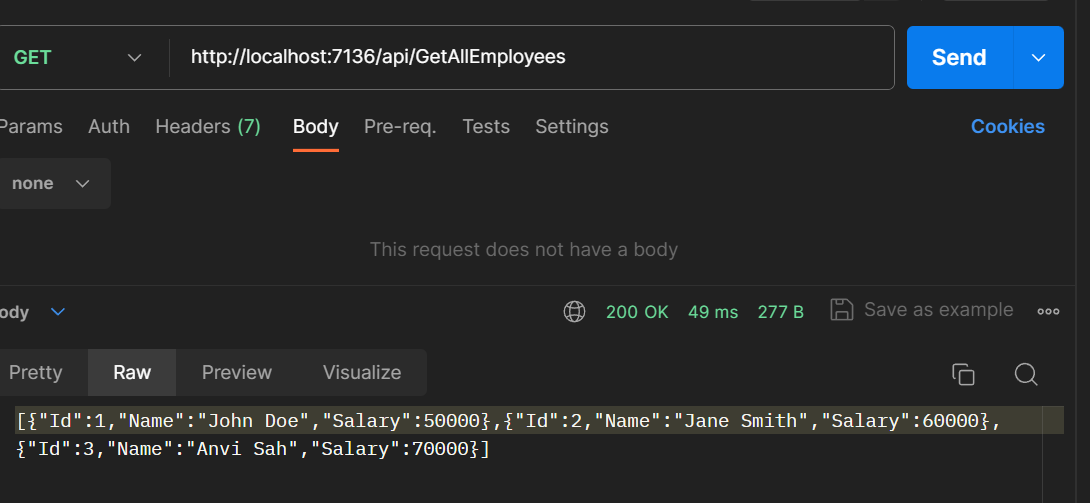
GET Method
//Get Method
[Function("GetAllEmployees")]
public HttpResponseData GetAllEmployees(
    [HttpTrigger(AuthorizationLevel.Anonymous, "get")] HttpRequestData req)
{
    _logger.LogInformation("GetAllEmployees function processed a request.");

    var response = req.CreateResponse(HttpStatusCode.OK);
    response.Headers.Add("Content-Type", "application/json; charset=utf-8");

    response.WriteString(JsonSerializer.Serialize(employeeDataStore));

    return response;
}
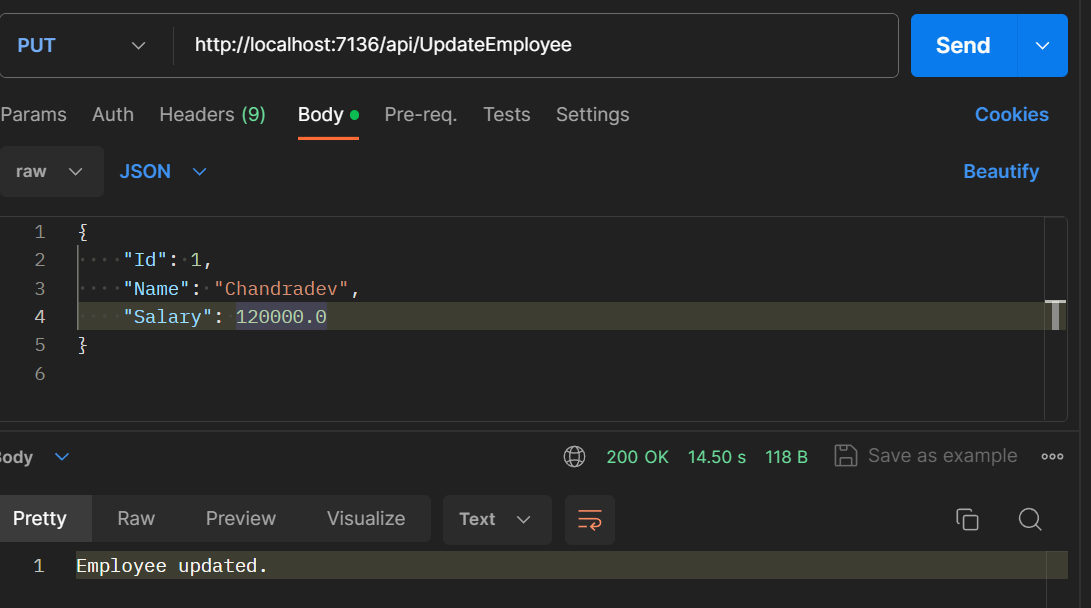
PUT Method
//PUT Method
[Function("UpdateEmployee")]
public HttpResponseData UpdateEmployee(
    [HttpTrigger(AuthorizationLevel.Anonymous, "put")] HttpRequestData req)
{
    _logger.LogInformation("UpdateEmployee function processed a request.");

    var requestBody = req.ReadAsStringAsync().Result;
    var updatedEmployee = JsonSerializer.Deserialize<Employee>(requestBody);

    // Find and update the employee based on Id
    var existingEmployee = employeeDataStore.Find(e => e.Id == updatedEmployee.Id);
    if (existingEmployee != null)
    {
        existingEmployee.Name = updatedEmployee.Name;
        existingEmployee.Salary = updatedEmployee.Salary;
    }

    var response = req.CreateResponse(HttpStatusCode.OK);
    response.WriteString("Employee updated.");

    return response;
}
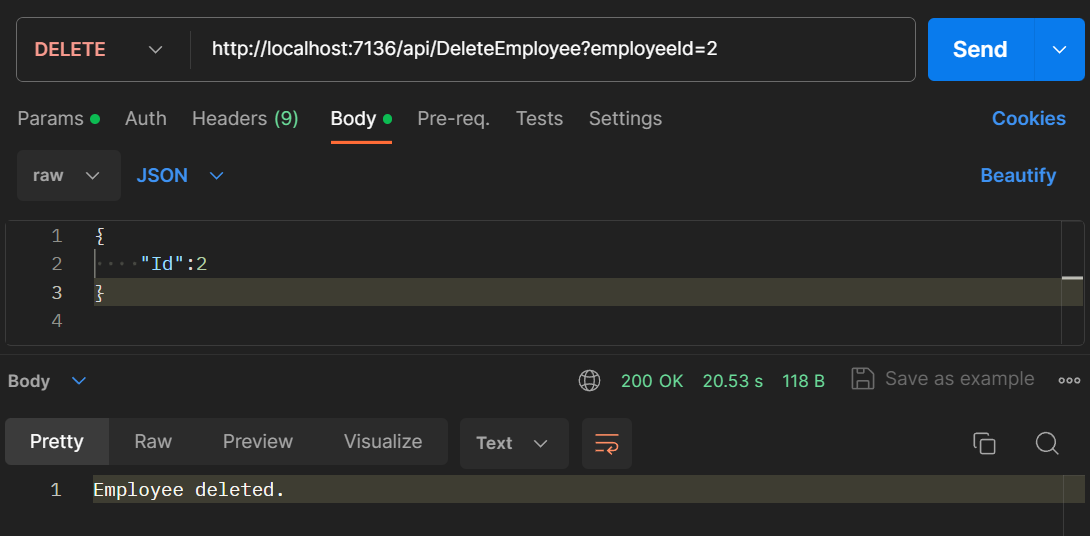
Delete Method
 //Delete Method
 [Function("DeleteEmployee")]
 public HttpResponseData DeleteEmployee(
     [HttpTrigger(AuthorizationLevel.Anonymous, "delete")] HttpRequestData req)
 {
     _logger.LogInformation("DeleteEmployee function processed a request.");

     var requestBody = req.ReadAsStringAsync().Result;
     var employeeIdToDelete = JsonSerializer.Deserialize<Employee>(requestBody);

     // Find and remove the employee based on Id
     var employeeToDelete = employeeDataStore.Find(e => e.Id == employeeIdToDelete.Id);
     if (employeeToDelete != null)
     {
         employeeDataStore.Remove(employeeToDelete);
     }

     var response = req.CreateResponse(HttpStatusCode.OK);
     response.WriteString("Employee deleted.");

     return response;
 }
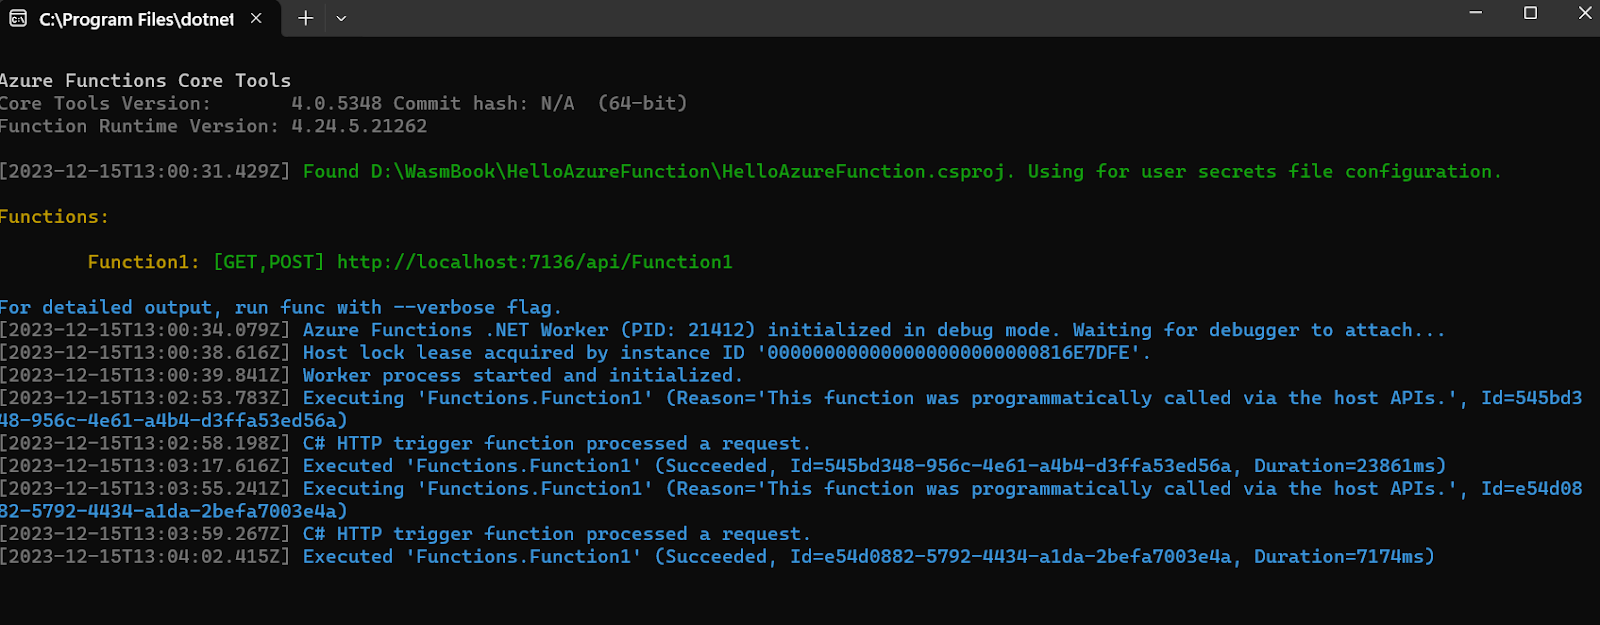
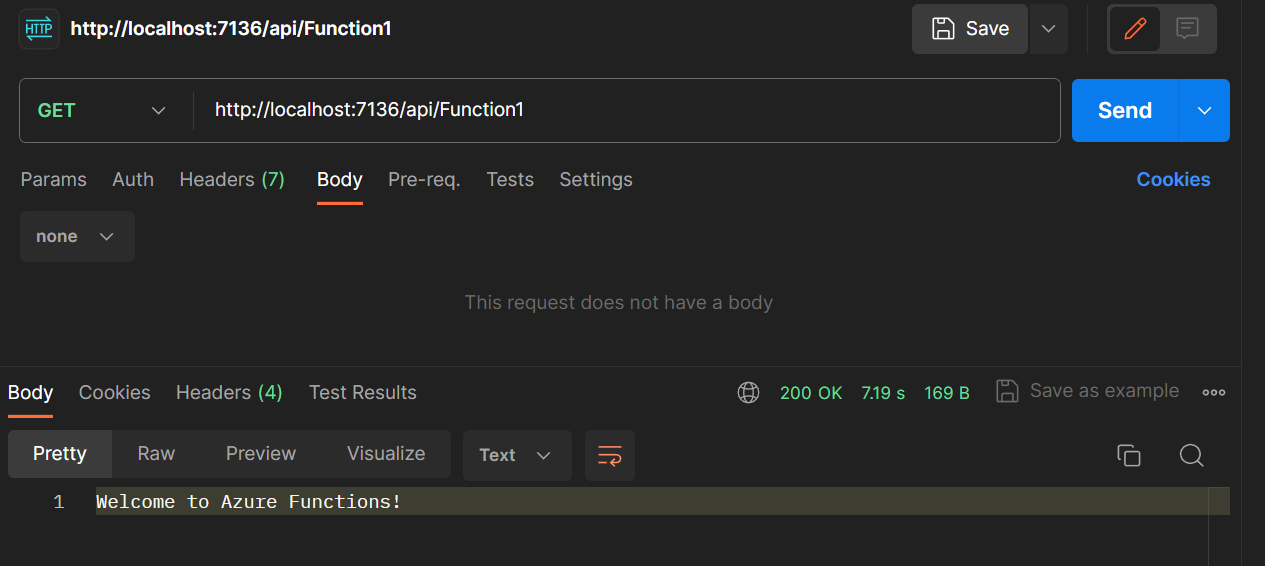
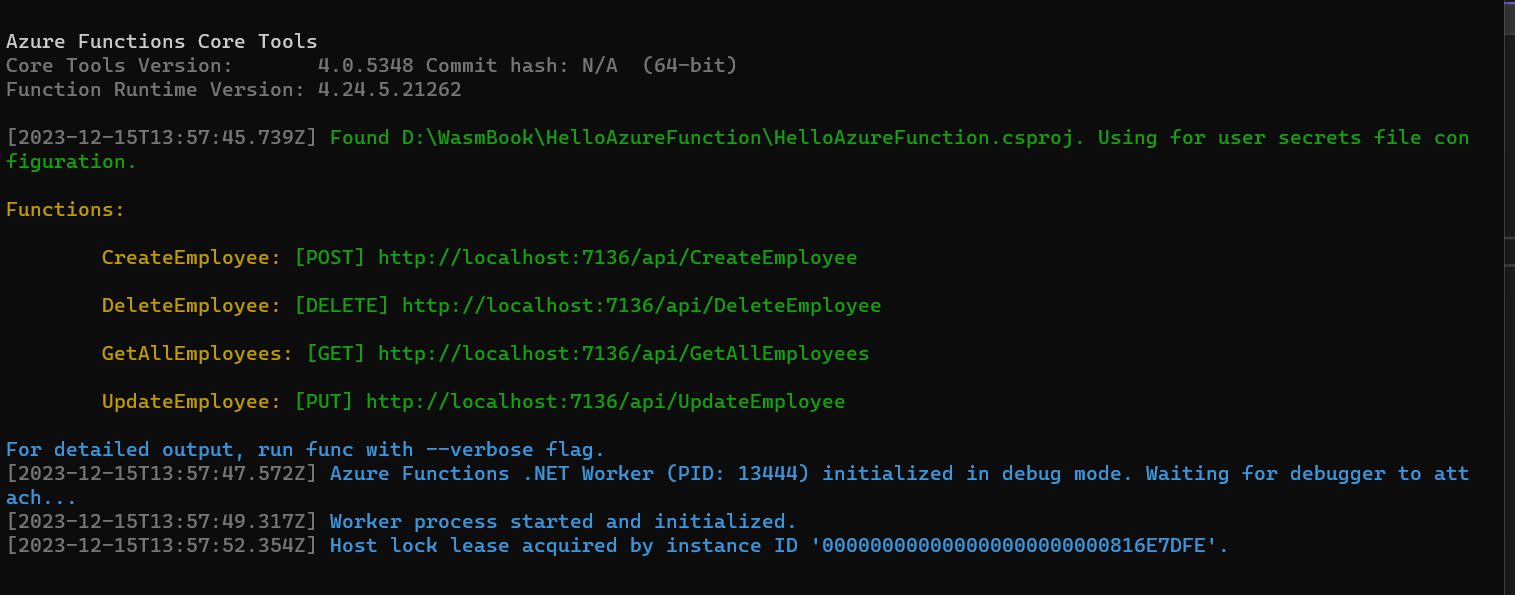
Now run the application and test on postman.
Summary
In the above demo, we saw that how easily we are able to create RESTful APIs with the help of HTTP Trigger.
Source Code