How to deploy BlazorHero App to Azure ?


Blazor Hero is good open source project for learning the Blazor concept, Even though you can customize and use on your project.

https://github.com/blazorhero/CleanArchitecture

Recently I got a chance to deploy this application on Azure, So I m writing step by step note on this.

If you are using visual studio deployment wizard, it is very simple to do it. I hope you have already created profile on Azure portal

There are the following Steps:

>> Clone the BlazorHero from github then clean and re-build the application

>> Go to the LocalizationConstants.cs file comment the given below

Note: Currently Azure is not supporting this country culture code.

  • Go to visual studio build >> publish server
  • Select azure like this

Click on Next button

Click on Create

Step 6: Configure the Sql server like this

Now Click on Publish Button

You will able to see the running application on Azure Cloud like this

Summary:

In this post we saw the magic of visual studio 2022 deployment wizard tool. We saw that without going azure portal, we are able to deploy the Blazor Application on azure cloud.

Azure AD Authentication on Blazor WebAssembly


Implementing Azure AD Authentication In Blazor web assembly is very much similar to Blazor Server.

Please read the below post to know more details about azure portal configuration for Blazor Server

Step 1: Register the single page application on azure portal like this
Note: donot forget to append localhost URL with authentication/login-callback

Step 2: Select the Access Token and Id Token like this

Now create the Blazor Webassembly project with Microsoft Identity Platform

Now it will install, all the Authentication related nuget package and boilerplate code for us.

Step 3: Go to appsettings.json file and keep the TenantId and ClientId here.

Step 4: Now run the application, It will work as expected.

Azure AD authentication on Blazor Server


Recently I have used Azure AD(Active Directive) authentication on my Blazor project, So I am writing small post on this topic.

As you know Azure Active Directory (Azure AD) is a cloud-based identity and access management service. It is very simple and easy to integrate in Blazor Application.

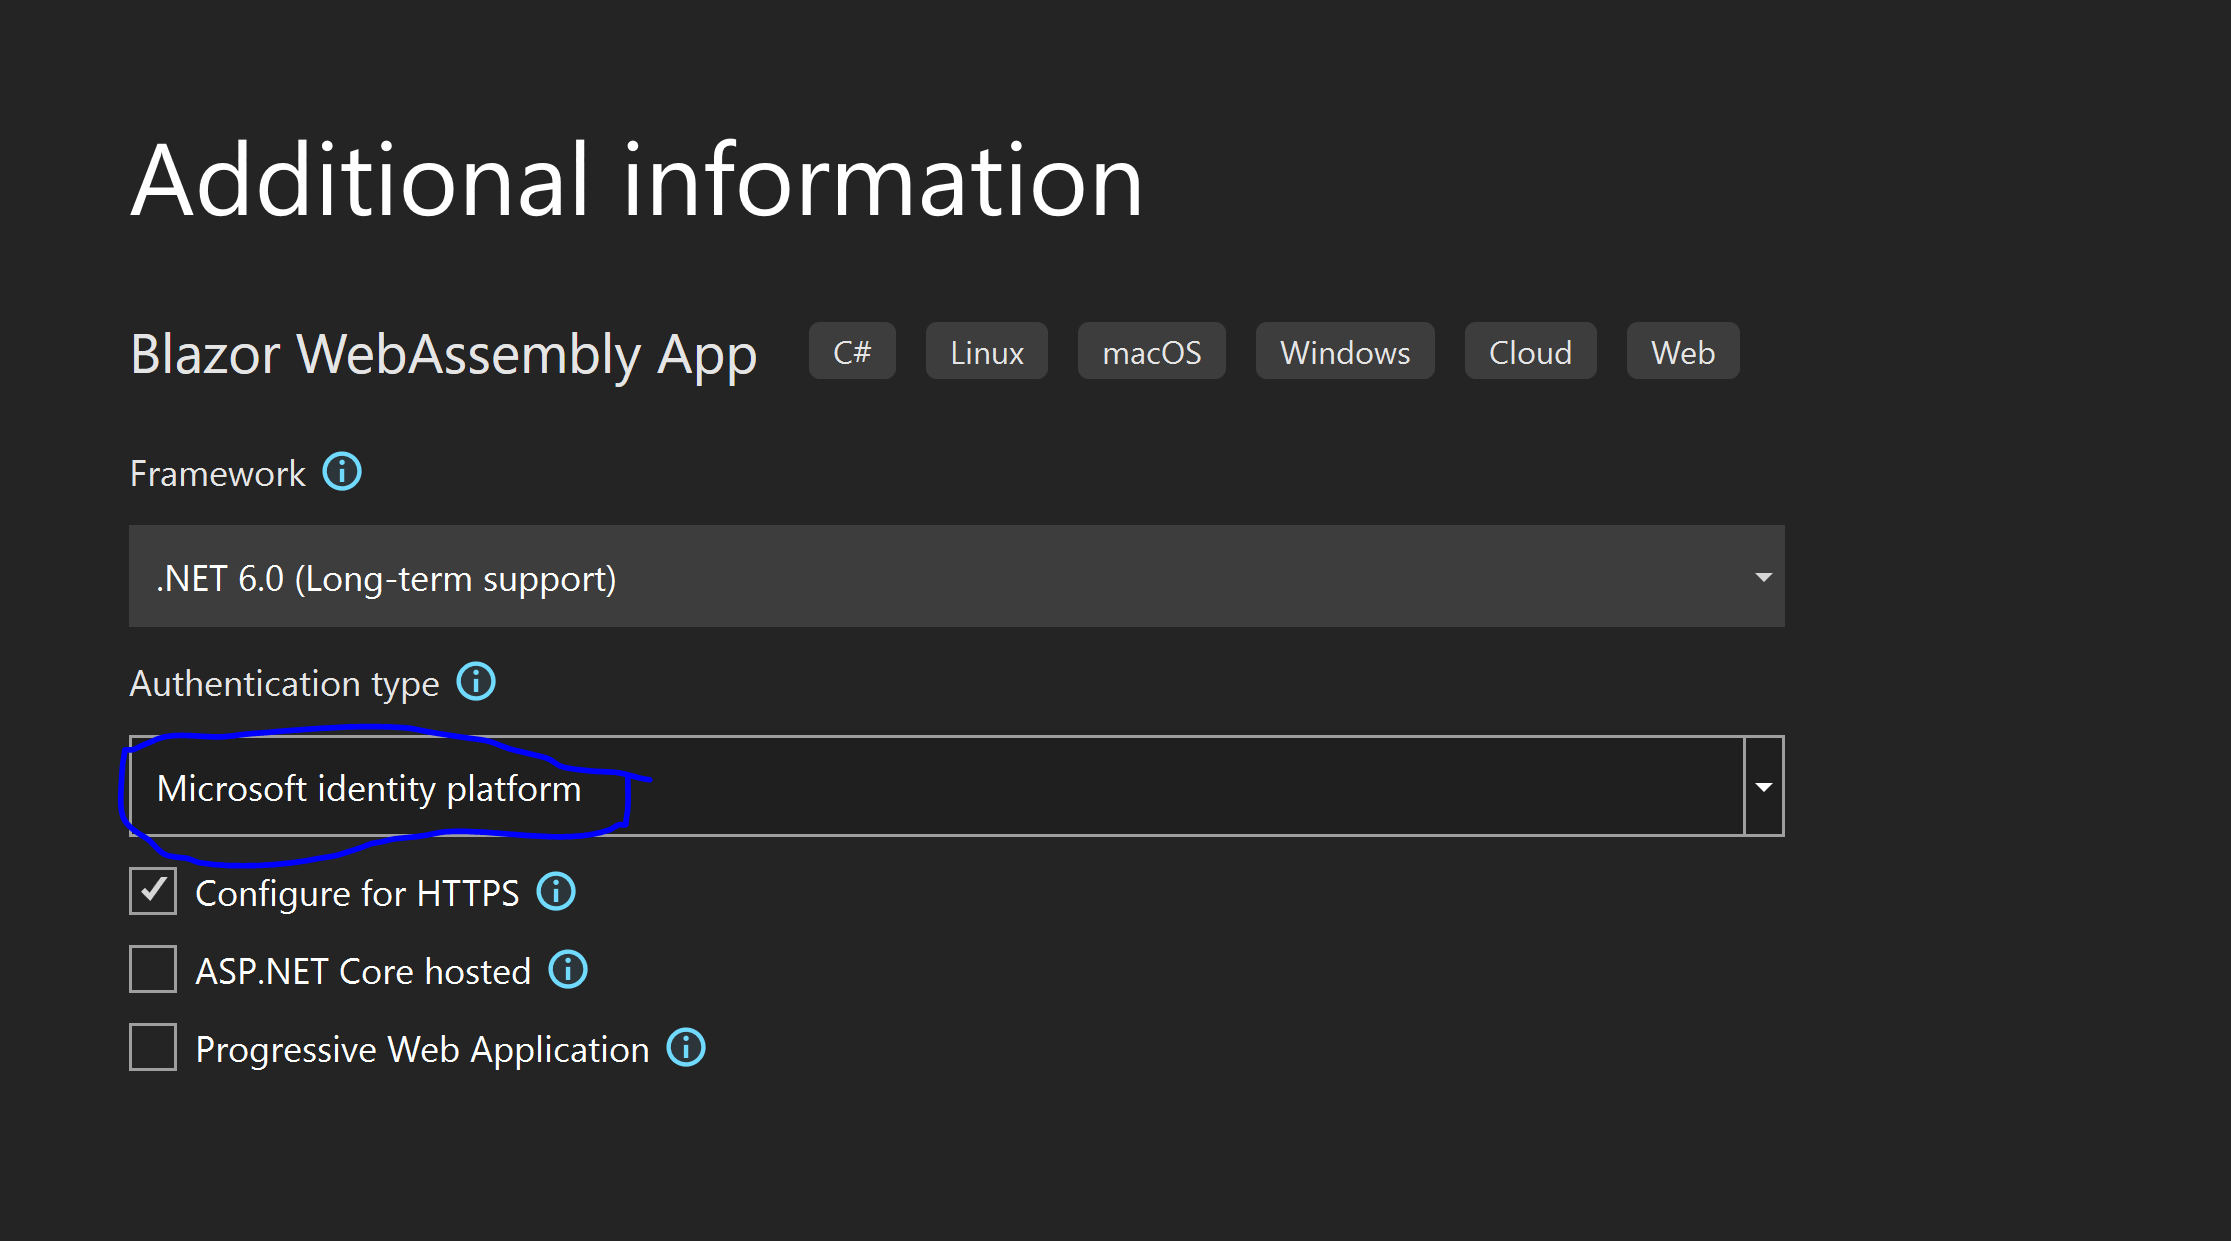
Step1: Create the Blazor server application like this

Step2: Select the Authentication Type as “Microsoft Identity Platform”

Step 3: Now go to Azure portal and click on Active Directory

Step4: Click on Add and App registration link then you will see the page like this

Step 5: Click on Register and pick the client and tenant Id

Step 6: Go to Authentication then select the Id taken and Access Token and save it, like this image

Step 7: Go to appsettings.json file and file the required input like this

Note: you will get the Domain Name from here

Now run the application, It will work.

How to prevent default enter key behavior on Entry screen in Blazor


In one of my blazor project, there was requirement to prevent default submit behavior on pressing enter key in middle of entry screen. I fixed it like given below.

Any Web browser, if we will press enter key in middle of entry screen and there are any button with type submit then it will triggered it. This is expected behavior of web browser. But we want to disable feature then we do like this.

UI for above screen

@page "/test1"
@using System.ComponentModel.DataAnnotations
<h3>Test1</h3>
<EditForm Model="empModel" OnValidSubmit="HandleValidSubmit">
    <DataAnnotationsValidator />
    <ValidationSummary />

   Name: <InputText id="name" @bind-Value="empModel.Name" /> <br /> <br />
   Address: <InputText id="name2" @bind-Value="empModel.Address" /><br /> <br />

    <button type="submit">Submit</button>
</EditForm>

@code {
    private Emp empModel = new Emp();

    private void HandleValidSubmit()
    {
        Console.WriteLine("OnValidSubmit");
    }

    public class Emp
    {
         [Required]
         [StringLength(10, ErrorMessage = "Name is too long.")]
         public string? Name { get; set; }

         [Required]
         public string? Address {get; set;}
    }

}

Step 1: Go to MainLayout.Razor and keep this script file to disable it

<script suppress-error="BL9992">
    //prevent submit on enter
    document.body.addEventListener('keypress', e => {
        if (e.which == 13 && !e.target.matches('button[type=submit]')) {
            const form = e.composedPath().find(e => e.matches('form'))
            const submitButton = form && form.querySelector('button[type=submit]:enabled');
            if (submitButton) {
                const preventSubmit = (e2) => {
                    e2.preventDefault();
                    return false;
                }
                // Browser emulates submit button click, when enter key is pressed, so we need to prevent that.
                form.addEventListener('click', preventSubmit, { once: true, capture: true });
                setTimeout(() => form.removeEventListener('click', preventSubmit, { capture: true }), 0); 
                // better clear the eventlistener despite once:true in case the keypress propagation has been stopped by some other eventhandler
            }           
        }
    });
</script>

Now it will apply on entire application.

Fetching current location on Blazor application.


Recently in one of my blazor project, I used this features, there was requirement to fetch the current address details on basis of Ip address.

I used this API service for this task. https://ipinfo.io/json

For this demo, I have used Blazor Server 6.0. and same process will be in Blazor webassembly

Step 1: Create the basic blazor server application

Step 2: Create a model class like given below.

Step 3: Create the service wrapper class like this

namespace Blazor_Comp_Poc.Data.Service
{
    public interface ICurrentLocation
    {
        public Task<LocaltionDetails> GetLocaltionDetails();
    }

    public class CurrentLocationService : ICurrentLocation
    {
        private readonly HttpClient httpClient;
        public CurrentLocationService(HttpClient httpClient)
        {
            this.httpClient = httpClient;
        }

        public async Task<LocaltionDetails> GetLocaltionDetails()
        {
            var result = await httpClient.GetFromJsonAsync<LocaltionDetails>("json");
            return result;
        }
    }
}

Step 4: Create the API URL in appsettings.json file like this

{
  "Logging": {
    "LogLevel": {
      "Default": "Information",
      "Microsoft.AspNetCore": "Warning"
    }
  },
  "AllowedHosts": "*",
  "Apiinfo": {
    "Apiurl": "https://ipinfo.io/"
  }
}

Step 5: Configure the required service on Program.cs like given below

Step 6: Now create the reusable component AddressComponentForUSA.razor in share folder like this
<fieldset class="border p-2">
    <legend class="float-none w-auto">Address Details</legend>
    @if (details != null)
    {
        <div class="container">
            <div class="row">
                <div class="col float-right m-md-2">City</div>
                <div class="col m-md-2"><input class="form-control" @bind=details.city /> </div>
            </div>
            <div class="row">
                <div class="col m-md-2">State</div>
                <div class="col m-md-2"><input class="form-control" @bind=details.region /></div>
            </div>
            <div class="row">
                <div class="col m-md-2">Zip</div>
                <div class="col m-md-2"><input class="form-control" @bind=details.postal /></div>
            </div>
        </div>
    }

</fieldset>

Step 7: Call the api in Blazor UI page like this

using Blazor_Comp_Poc.Data;
using Blazor_Comp_Poc.Data.Service;
using Microsoft.AspNetCore.Components;

namespace Blazor_Comp_Poc.Shared
{
    public partial class AddressComponentForUSA : ComponentBase
    {
        [Inject]
        public ICurrentLocation? CurrentLocationService { get; set; }
        public LocaltionDetails? details { get; set; }

        protected override async Task OnInitializedAsync()
        {
            details = await CurrentLocationService.GetLocaltionDetails();
            StateHasChanged();
        }
    }
}

Step 8: Call the component in main page like this

Now run the application, you will see the output as given on above screen shoot.

You can download the source code here, https://github.com/Chandradev819/Blazor_Comp_Poc